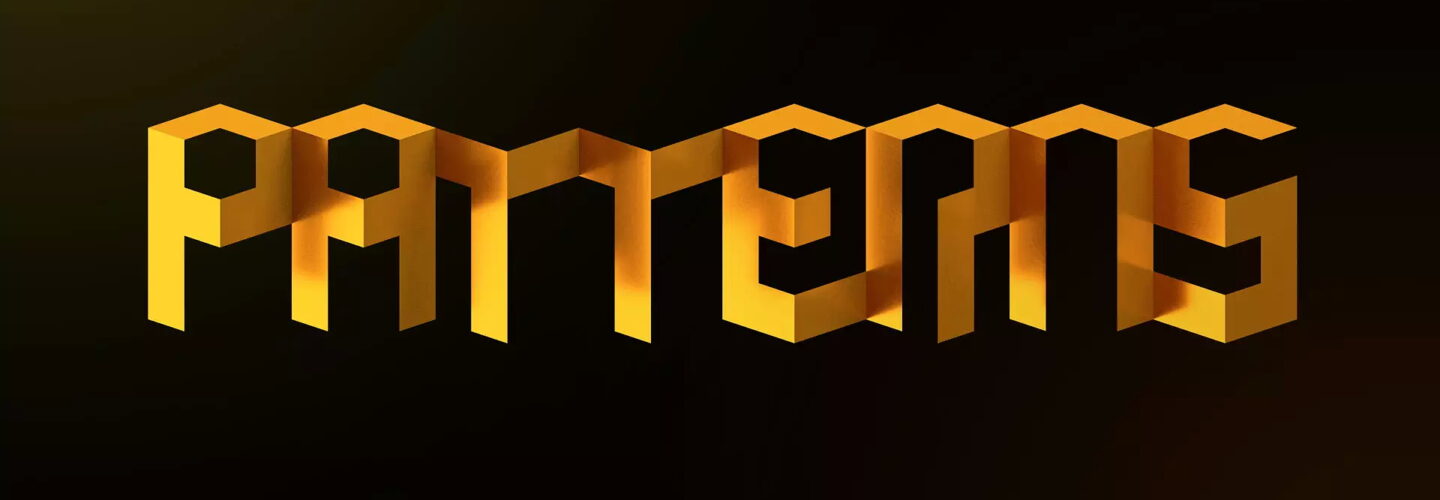
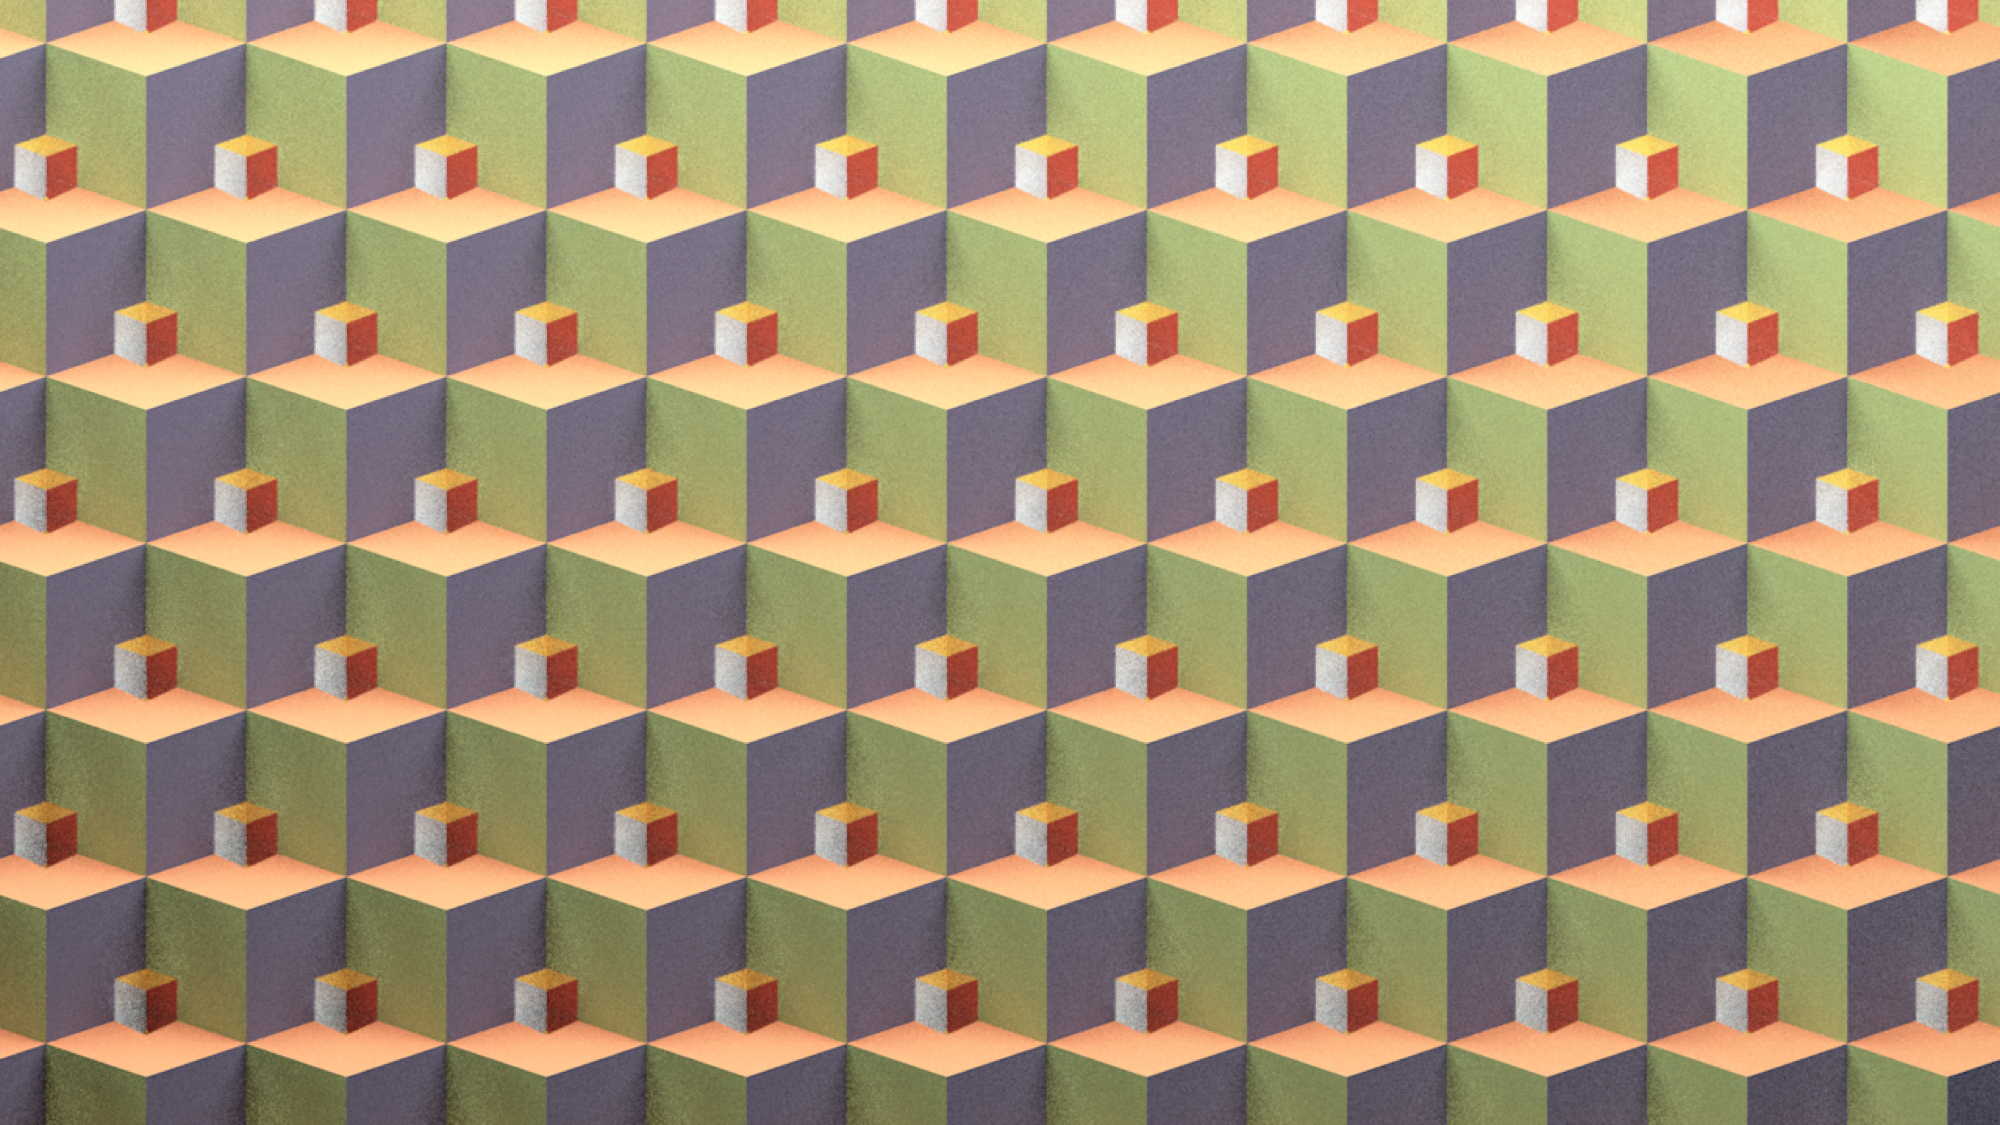
If the makers of the classic 80s Atari puzzle game Q*bert had ever decided to level design whilst under the influence of hallucinogens, then they may well have come up with something not dissimilar to Dimitris Katsafouros’ Patterns. After finally escaping the desire to rewatch the film on an eternal loop, DN invited Dimitris to walk us through the evolution of his playful 3D pattern piece.
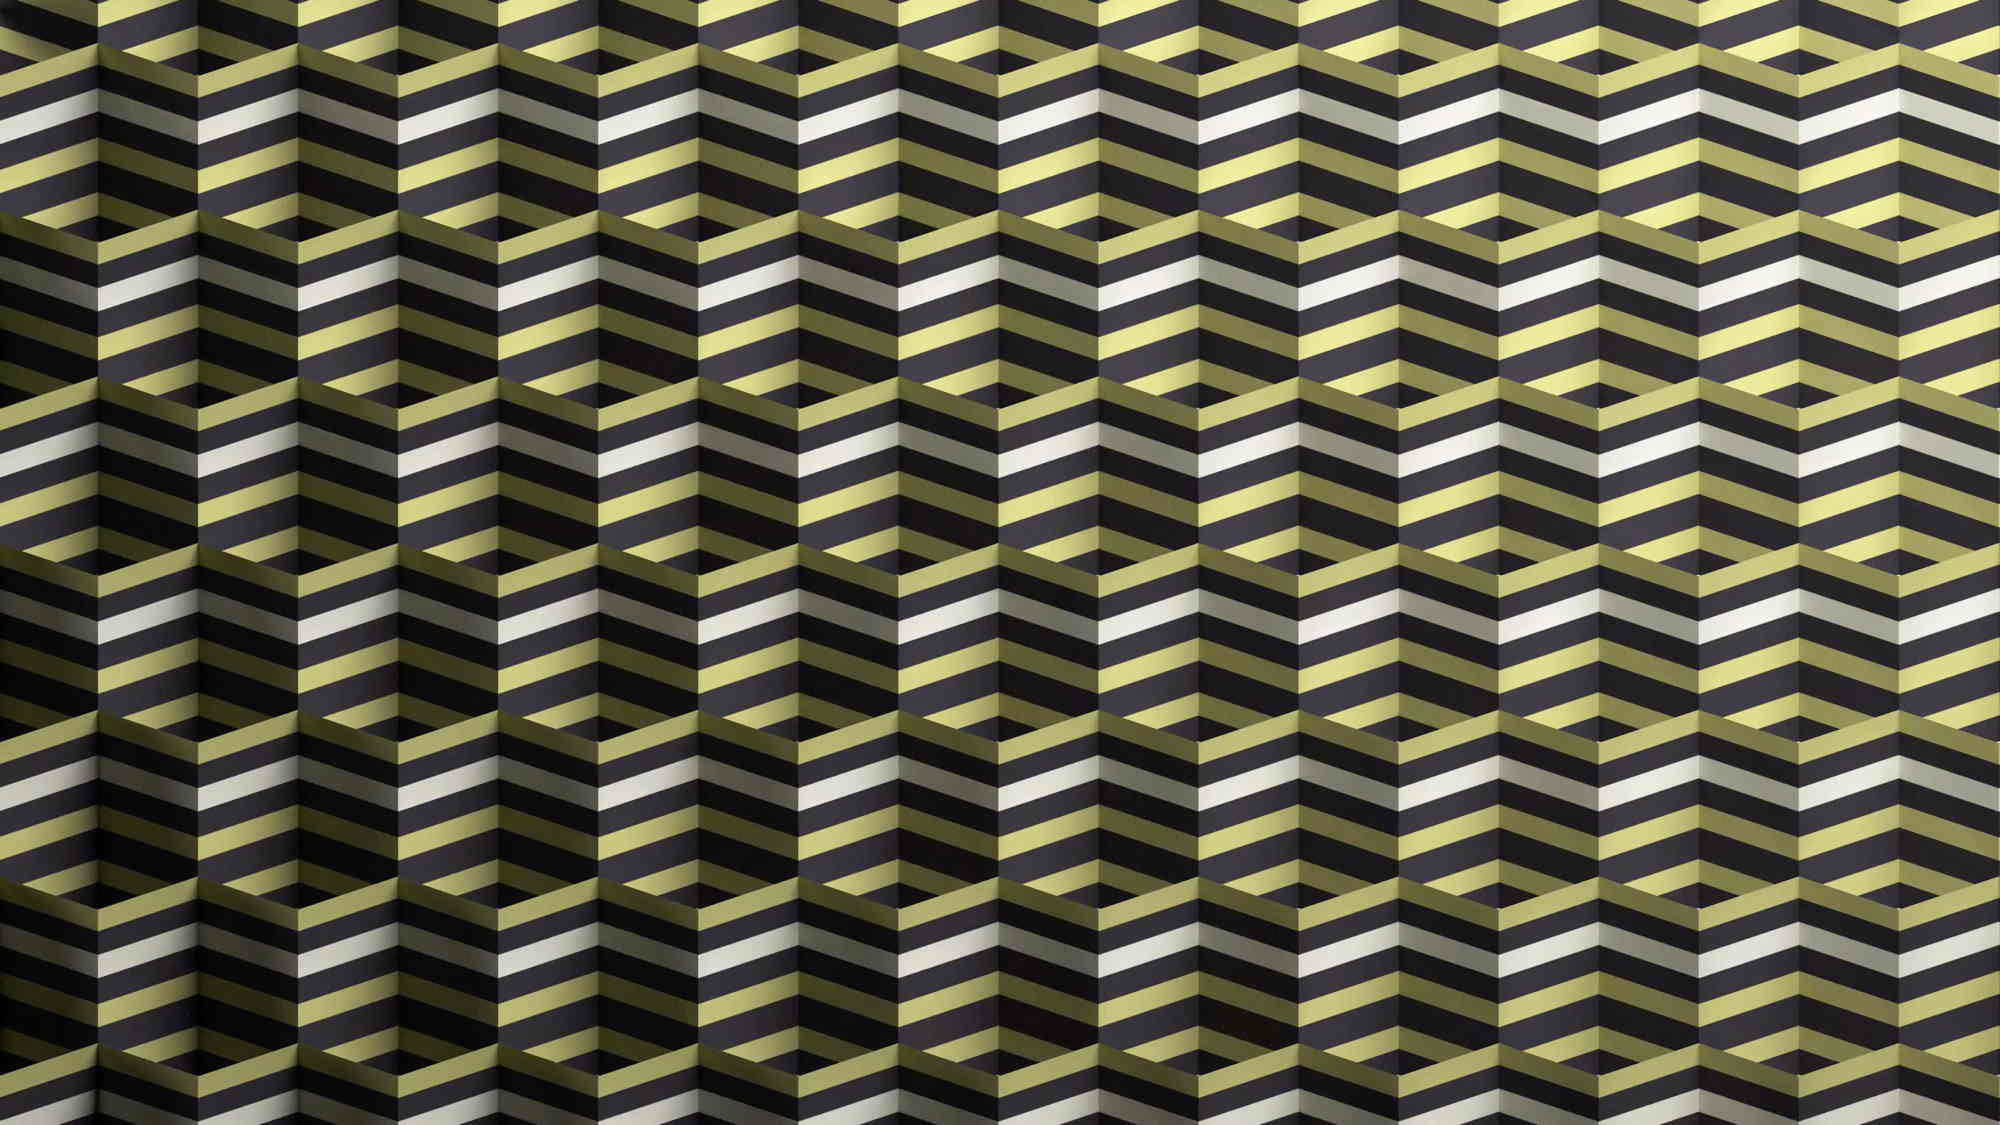
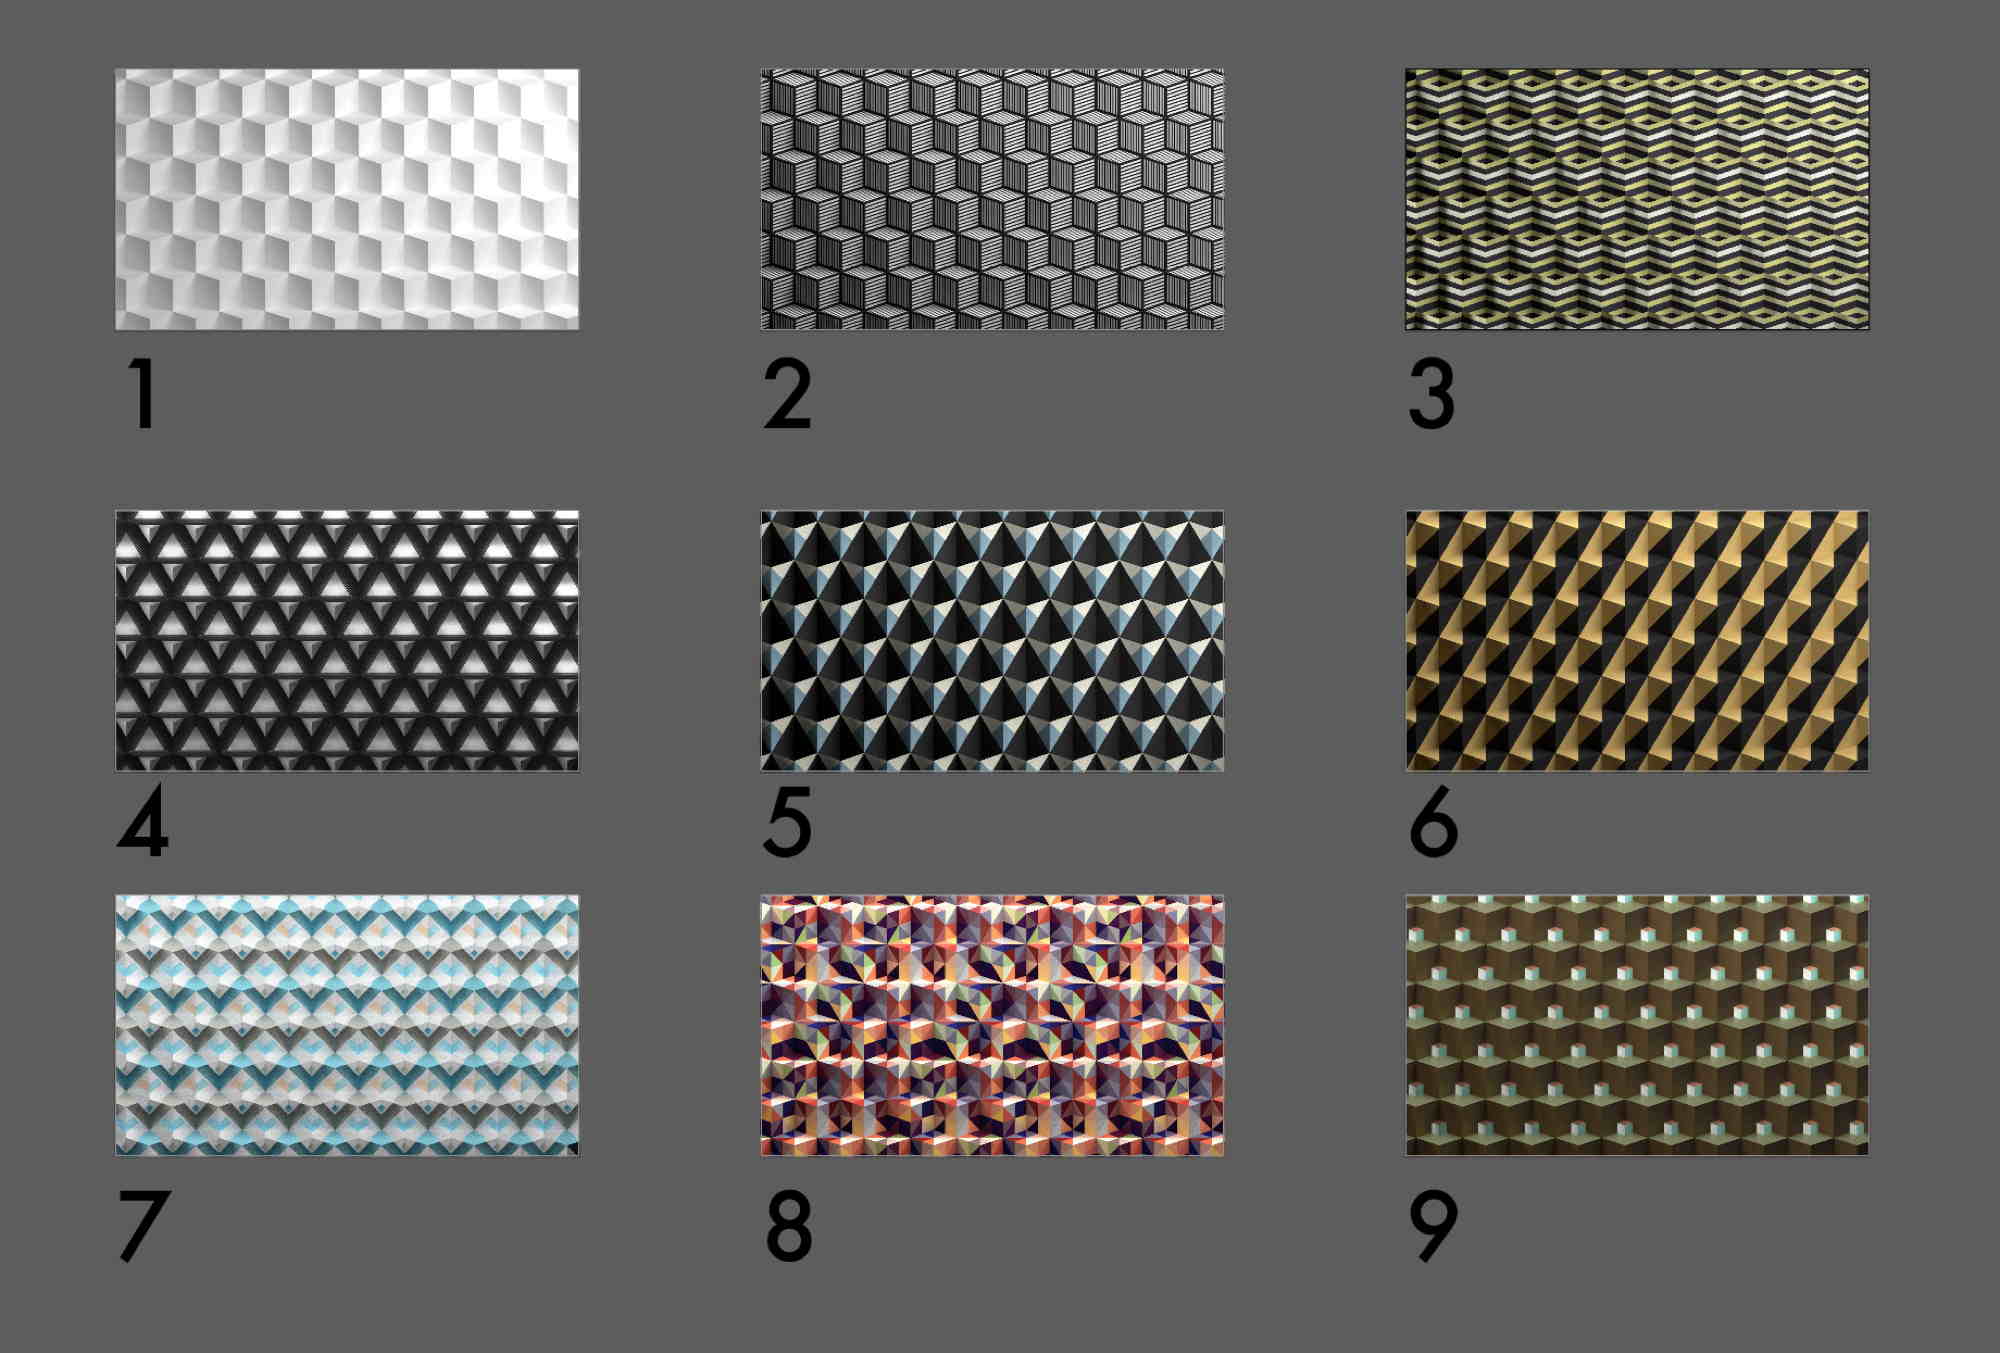
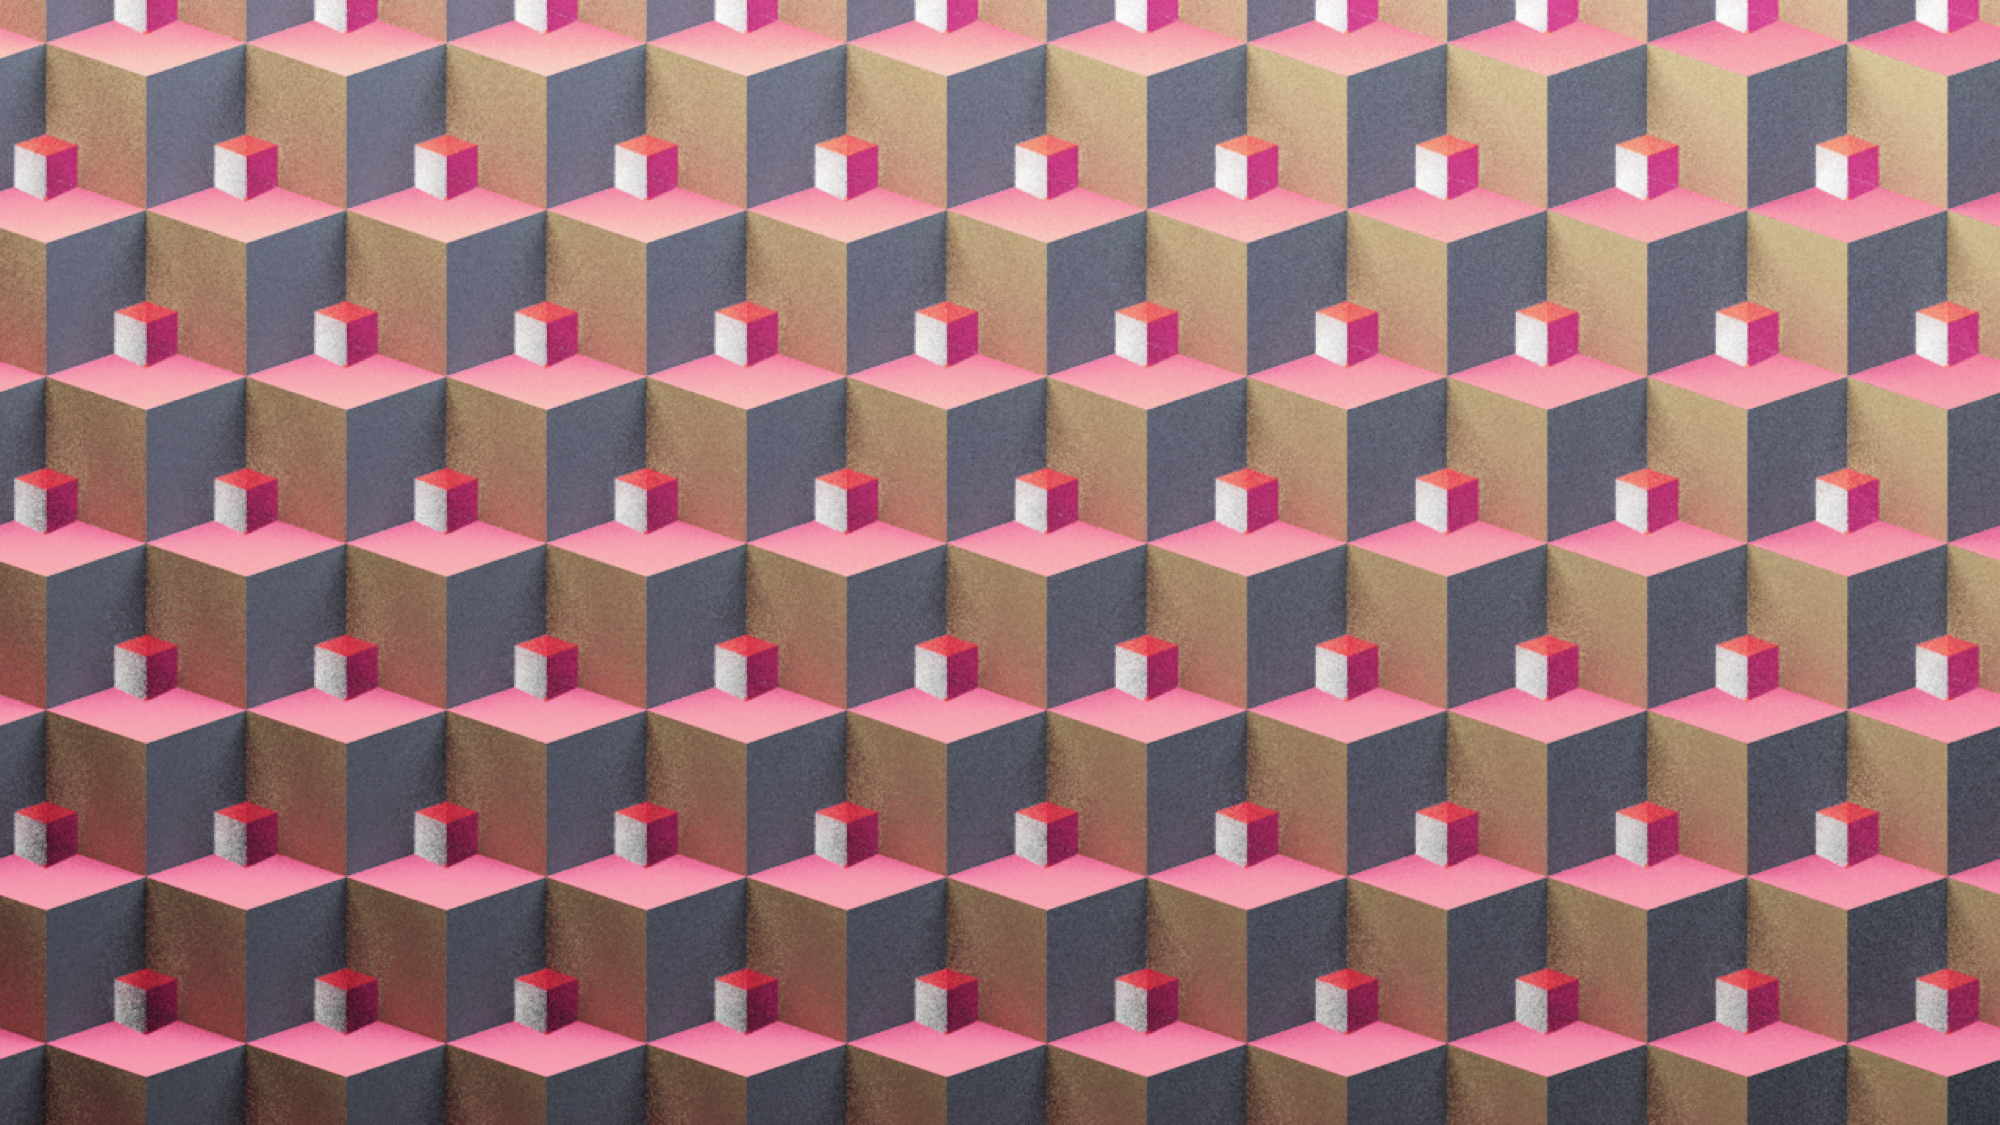
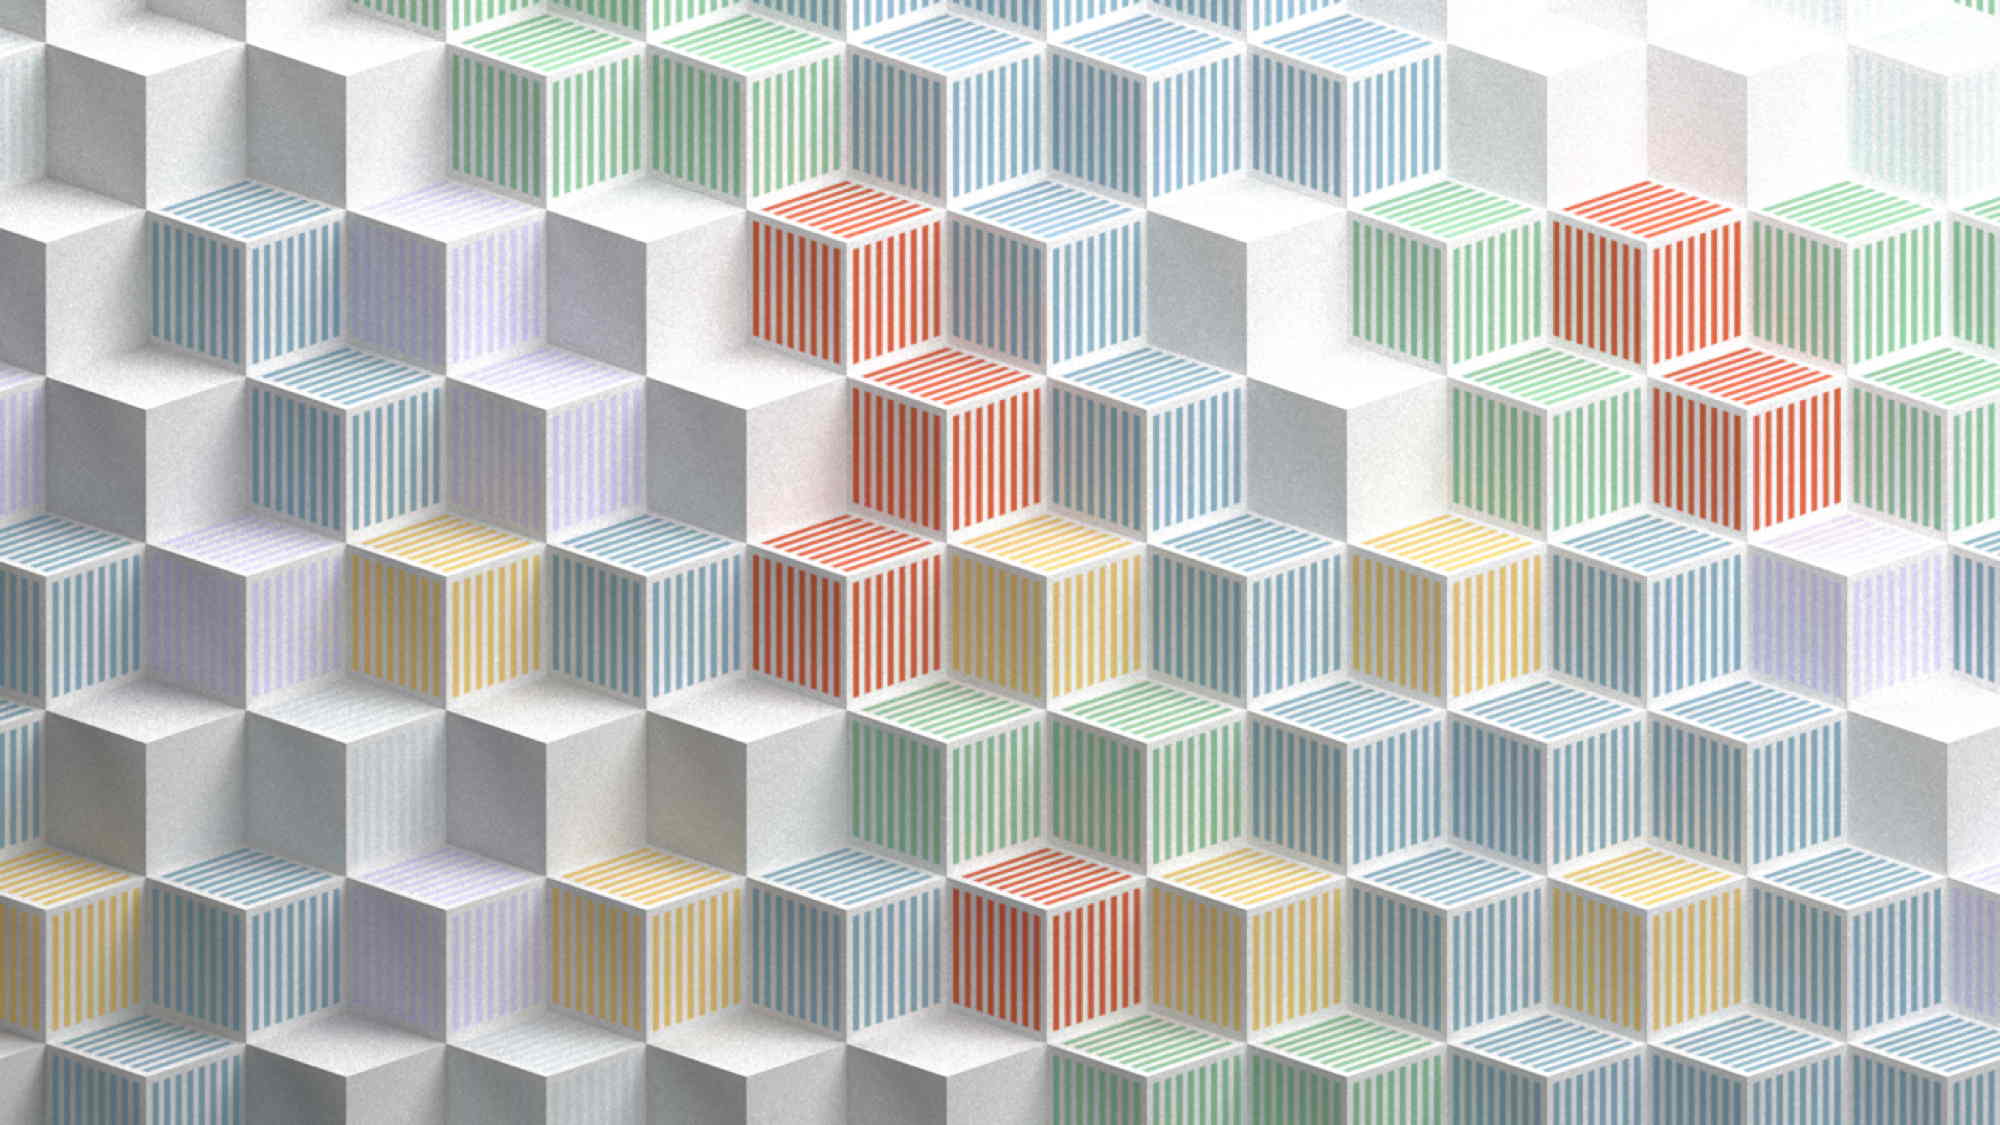
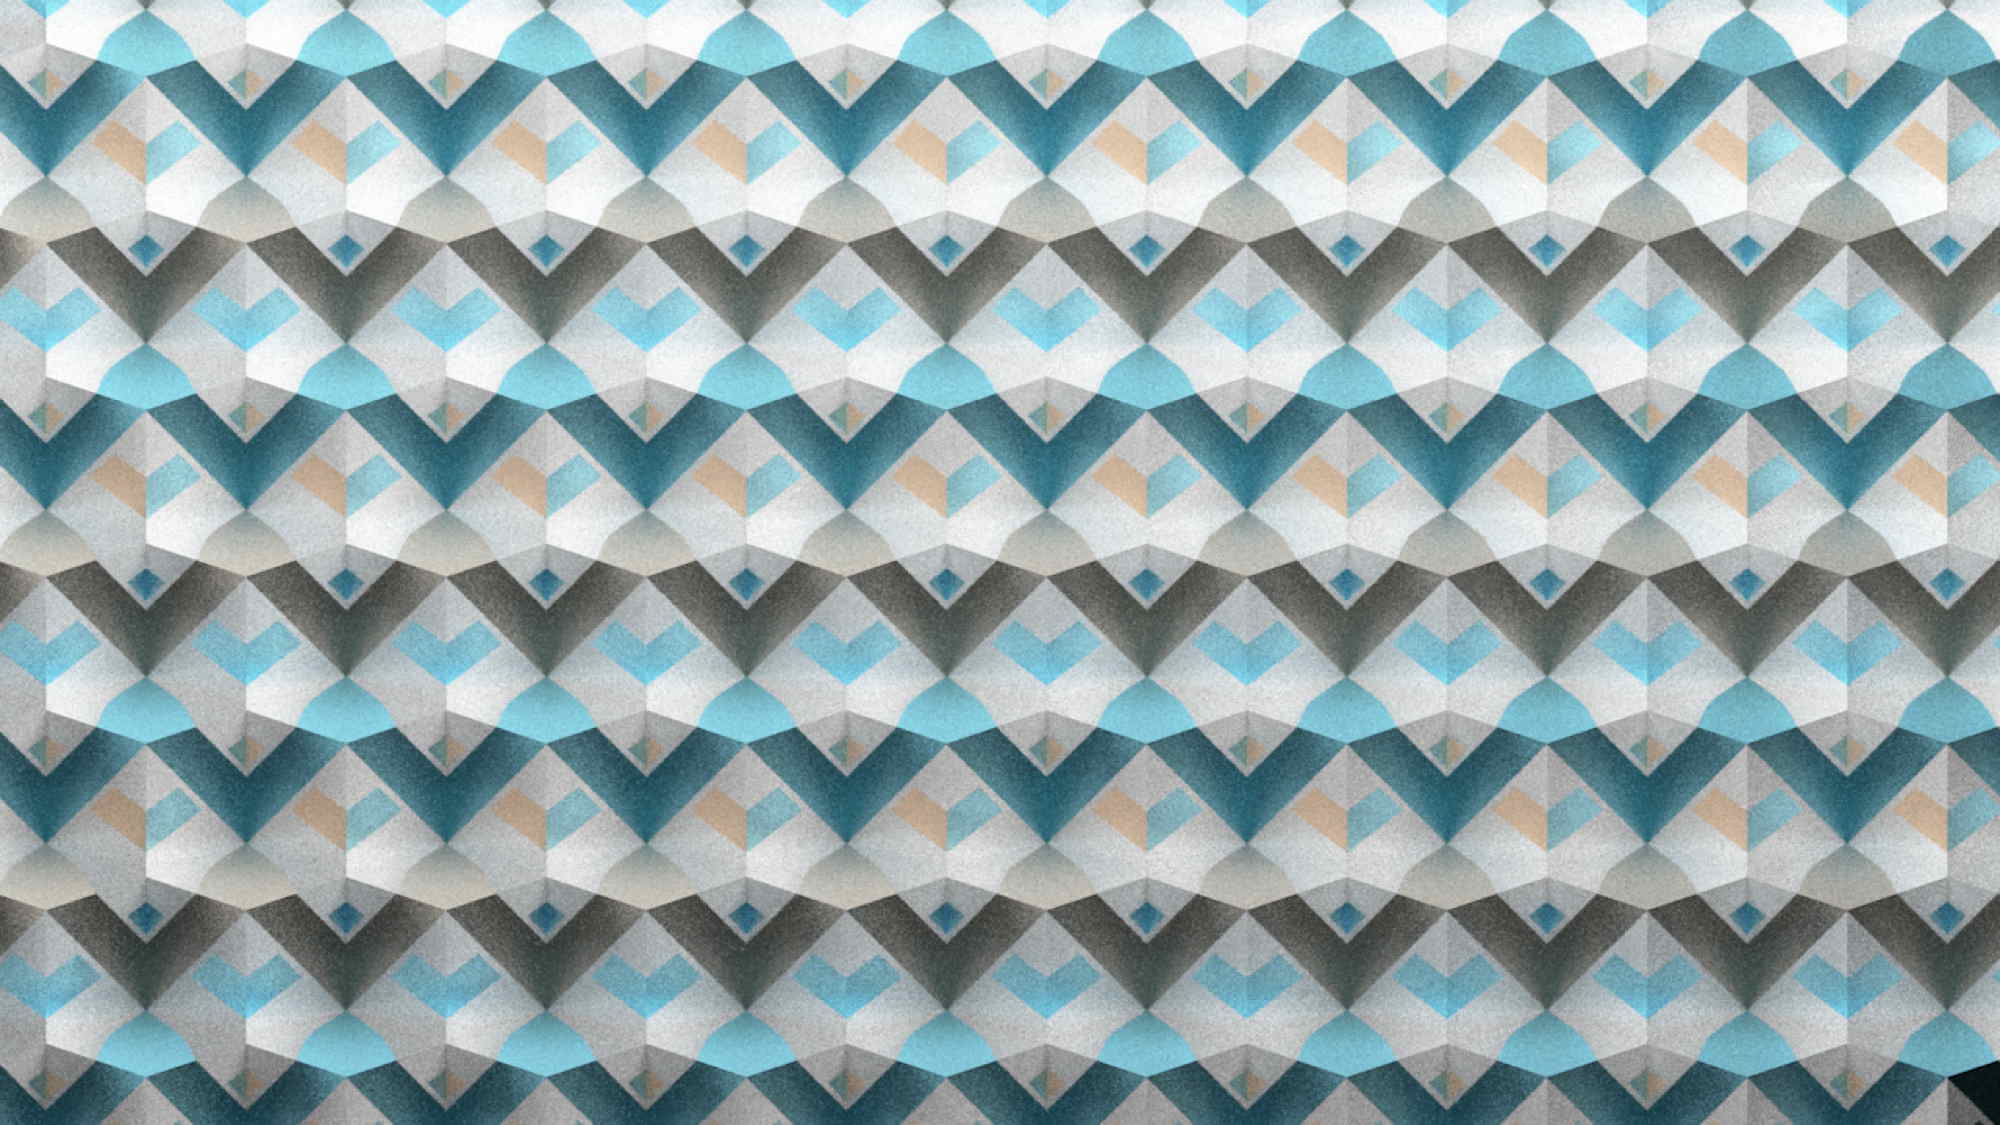
As a designer, I enjoy the decorative nature of patterns and the fact that they can create some really interesting visuals out of really simple elements. That was the basic idea that started it all. I knew very early on in the process, that I wanted to have the viewers on their toes watching the patterns evolve and trying to figure out what the next design will be. Even though the viewers can see how the patterns are done there is still a sense of wonder when a cubical shape, for example, transforms into triangles. I tried to play with that as much as possible throughout the video.
I’ve had the initial idea for quite a few months now but my work schedule never really allowed me to work on it. Finally, around Christmas time (2016) I had a couple of days off so I sat down and pushed myself to just do it! It took around 7 days to figure out the concept, the design, and all the scenes and animations. So at the end of those 7 days, I had all the elements ready and what was left was the rendering and final editing. More on the painful rendering later on! These last two pieces also took around 7-10 days. Most of it was reserved for the rendering.
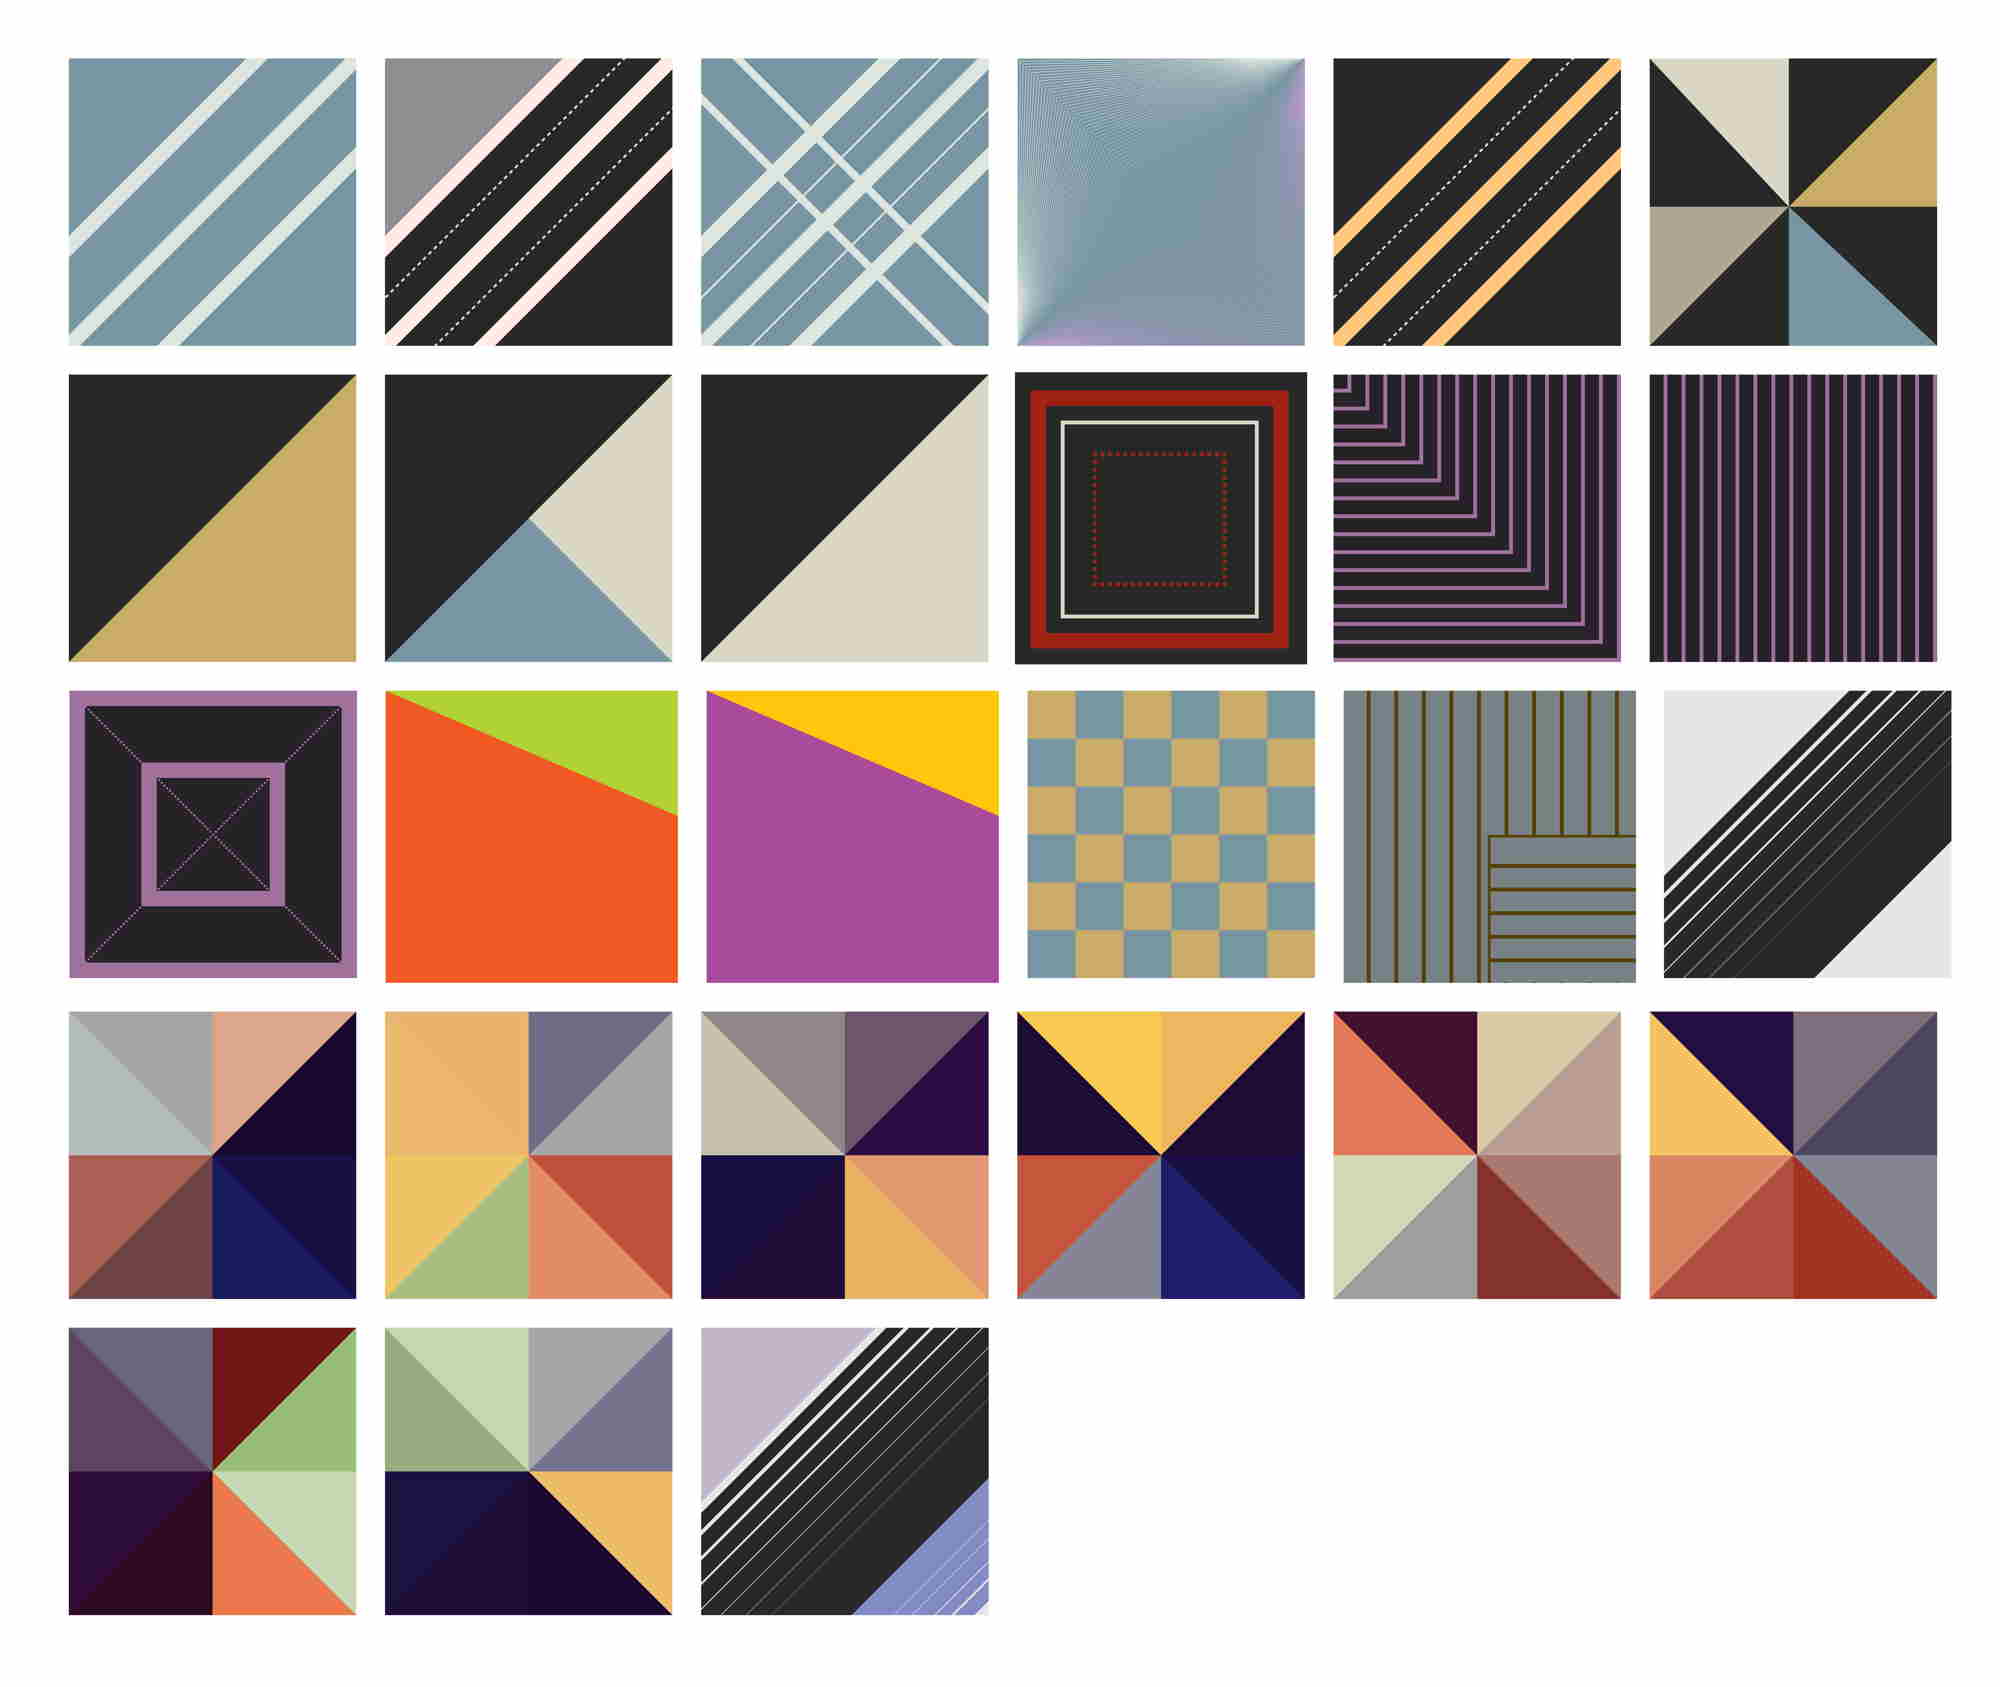
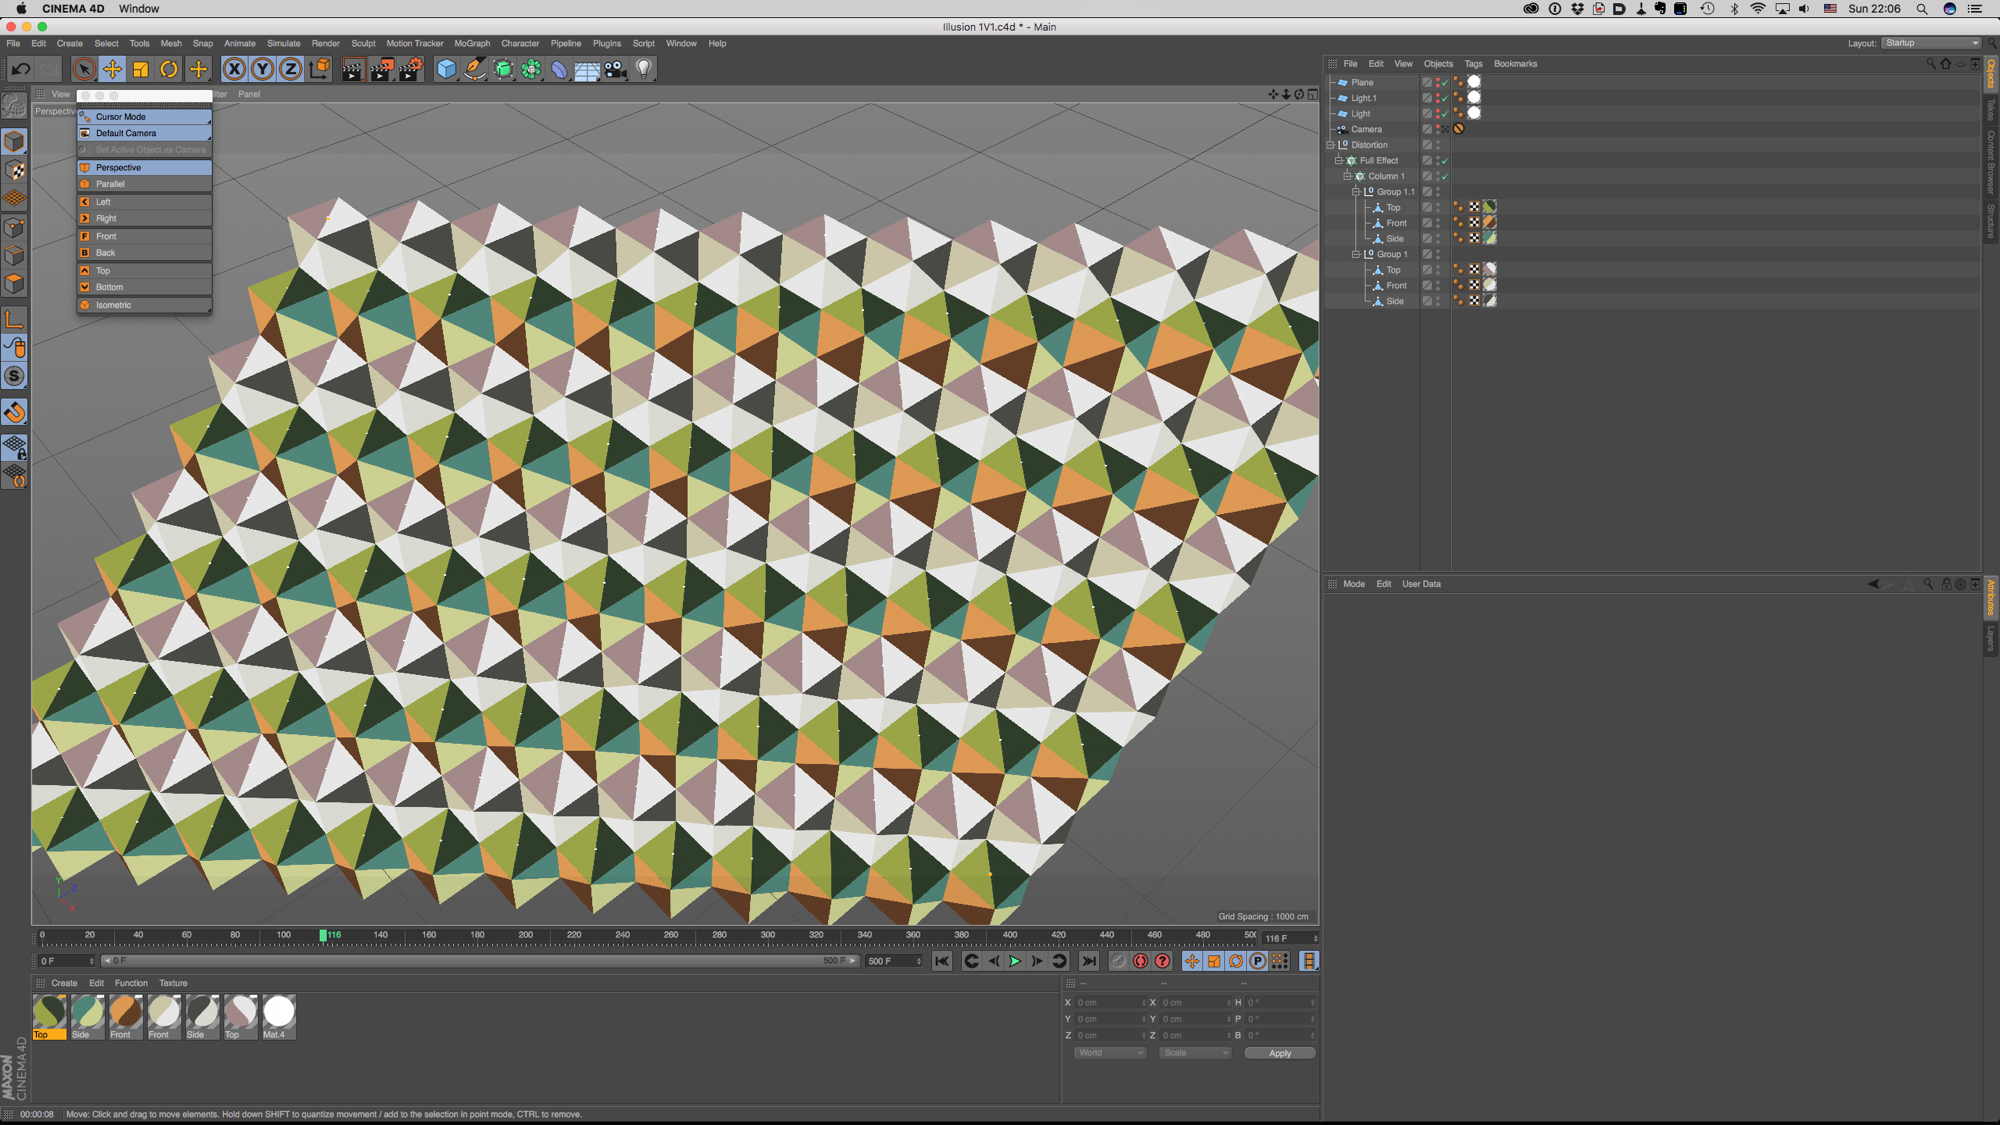
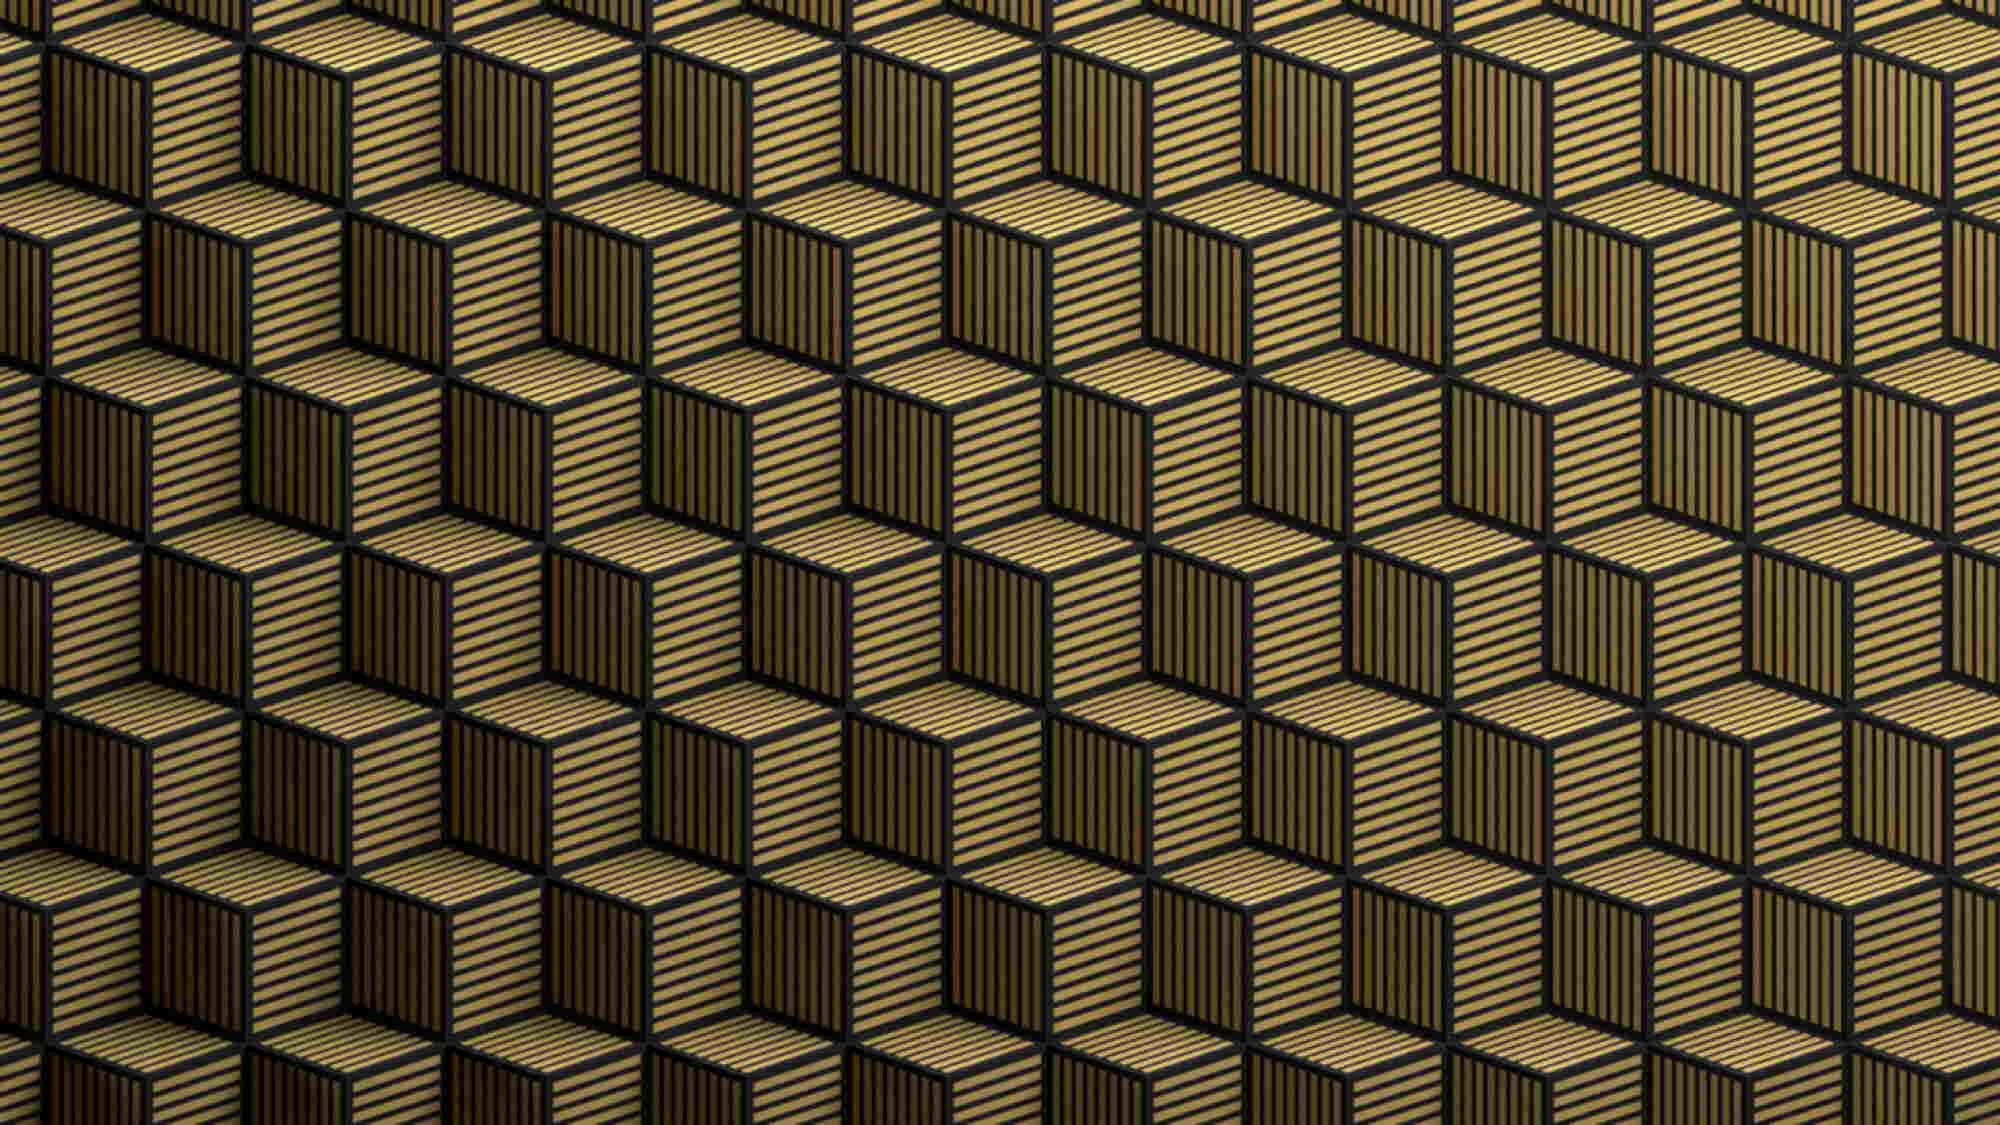
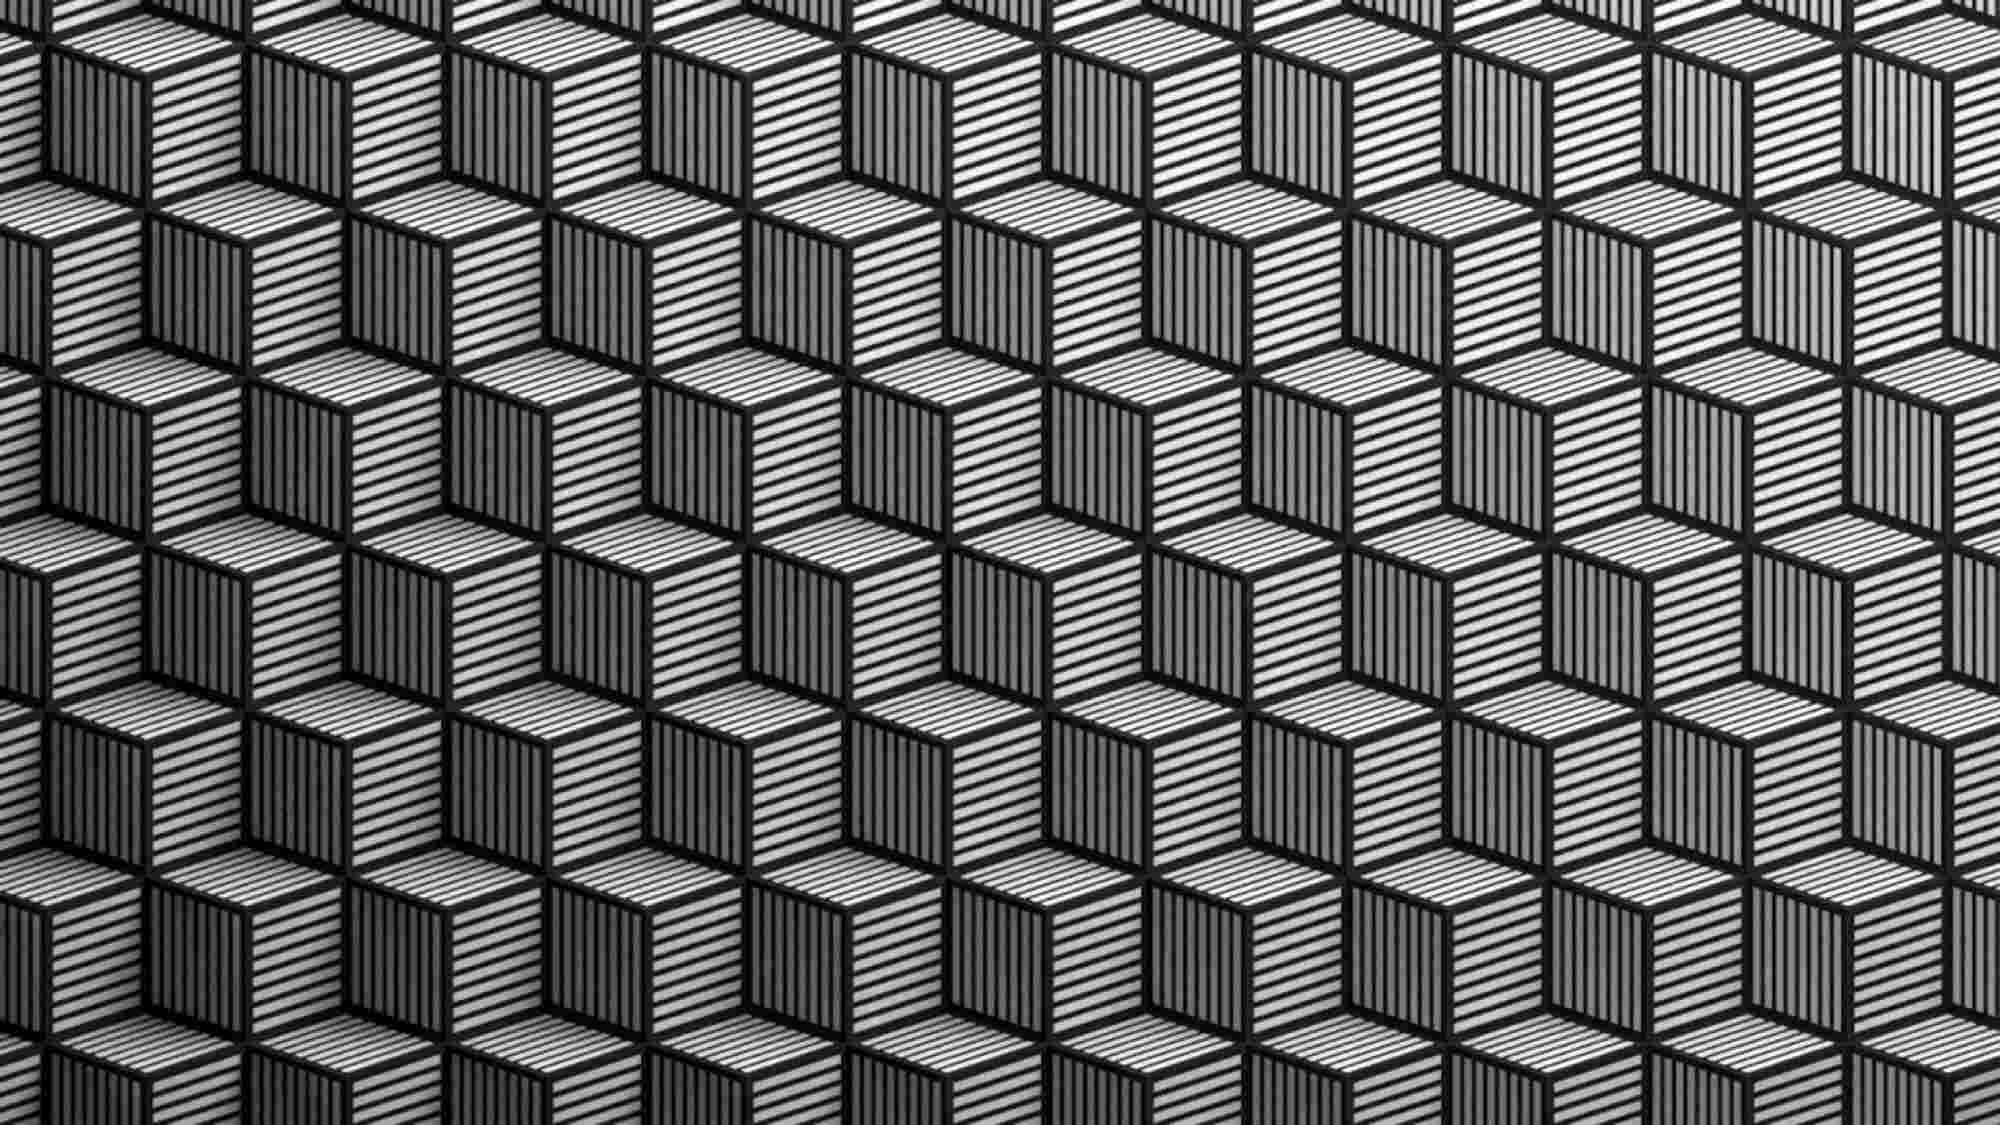
I first started out with the design of the patterns. I wanted to first get that nailed down and then see which pattern would transform to the other and how. Adobe Illustrator was used for the design of the cube faces and Cinema 4D was used to see how each design looked in 3D and as an image overall. That meant exporting the images and importing them into Cinema 4D to see if that pattern was any good. So there was a lot of back and forth between these programs while trying to refine each pattern. In some cases, I created the patterns directly in Cinema 4D in order to save time and my sanity! The gradient mask and the layer shader helped a lot there because I could create complex shapes out of stacking simple shapes together.
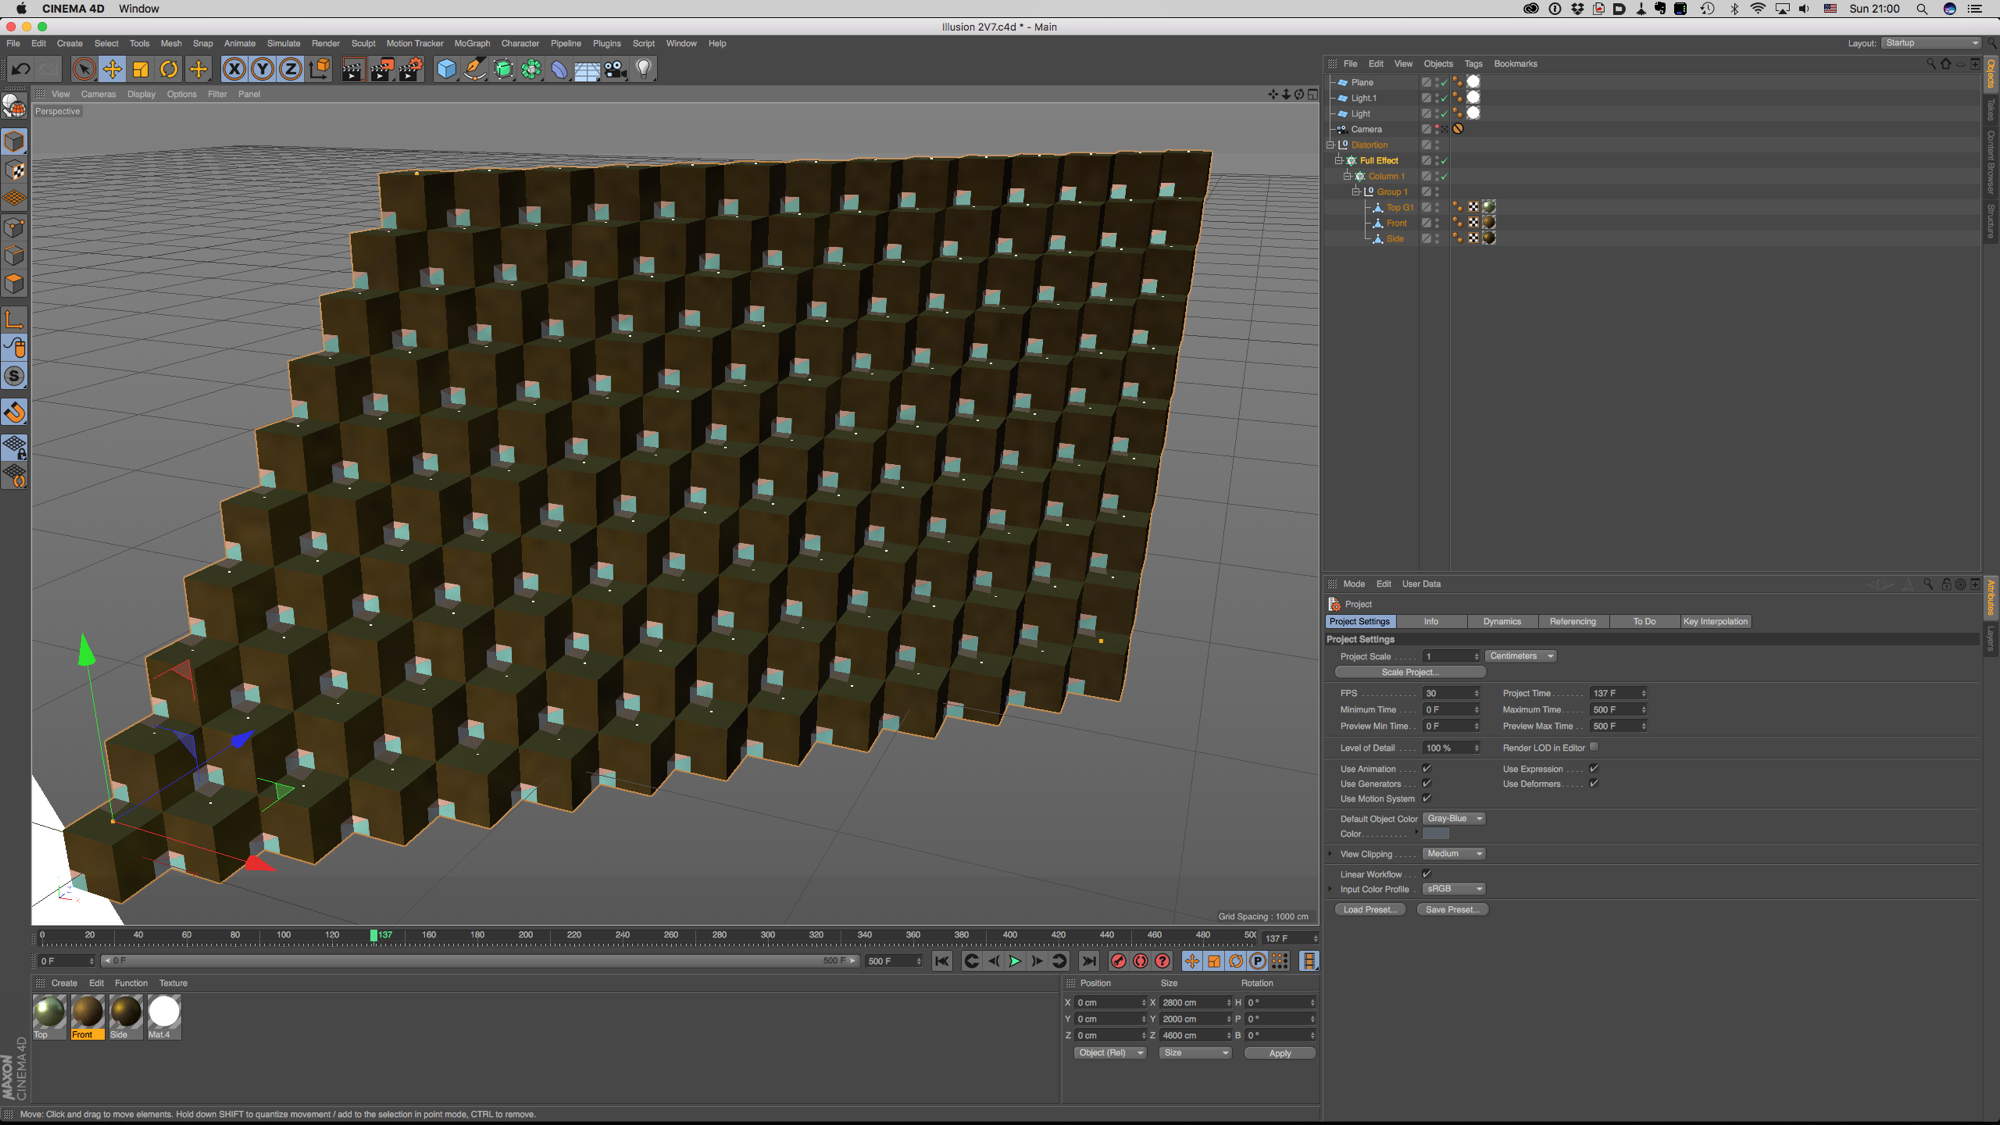
Some of the patterns definitely screwed with my head and building them was quite tricky. For example, the last one which creates the illusion of a smaller cube on top of the bigger cubes was a pattern that took a lot, and I mean A LOT of iterations! Also, the ones that use mirrored surfaces were a little bit tricky as well. Sometimes I thought I was going to get one result but I got something completely different, so it was a lot of trial and error. There was also a pattern that was creating octagonal shapes out of cubes, and even though on paper the idea worked, when I implemented it in 3D it didn’t work. It took a couple of hours until I figured out that the way this illusion would work was if I changed the viewing angle of the camera. So even though that was a really cool effect I just scrapped it because it would mess with my rule of having a static camera.
Initially, I wanted to go for a more flat design with no shading and only with animations transforming between the different shapes. While I was testing the idea out I didn’t feel that the animation offered anything exciting and it was more confusing rather than enticing. So I scrapped that but kept the no shading rule. As I was working more on it though I realised that not having shading made the look less exciting and most importantly took away from the physicality of the final look. If the viewer sees a 3 dimensional object transform into another shape the effect is stronger and more visceral. Quickly testing out the more ‘physical’ approach confirmed my initial impression and I decided to go that route.
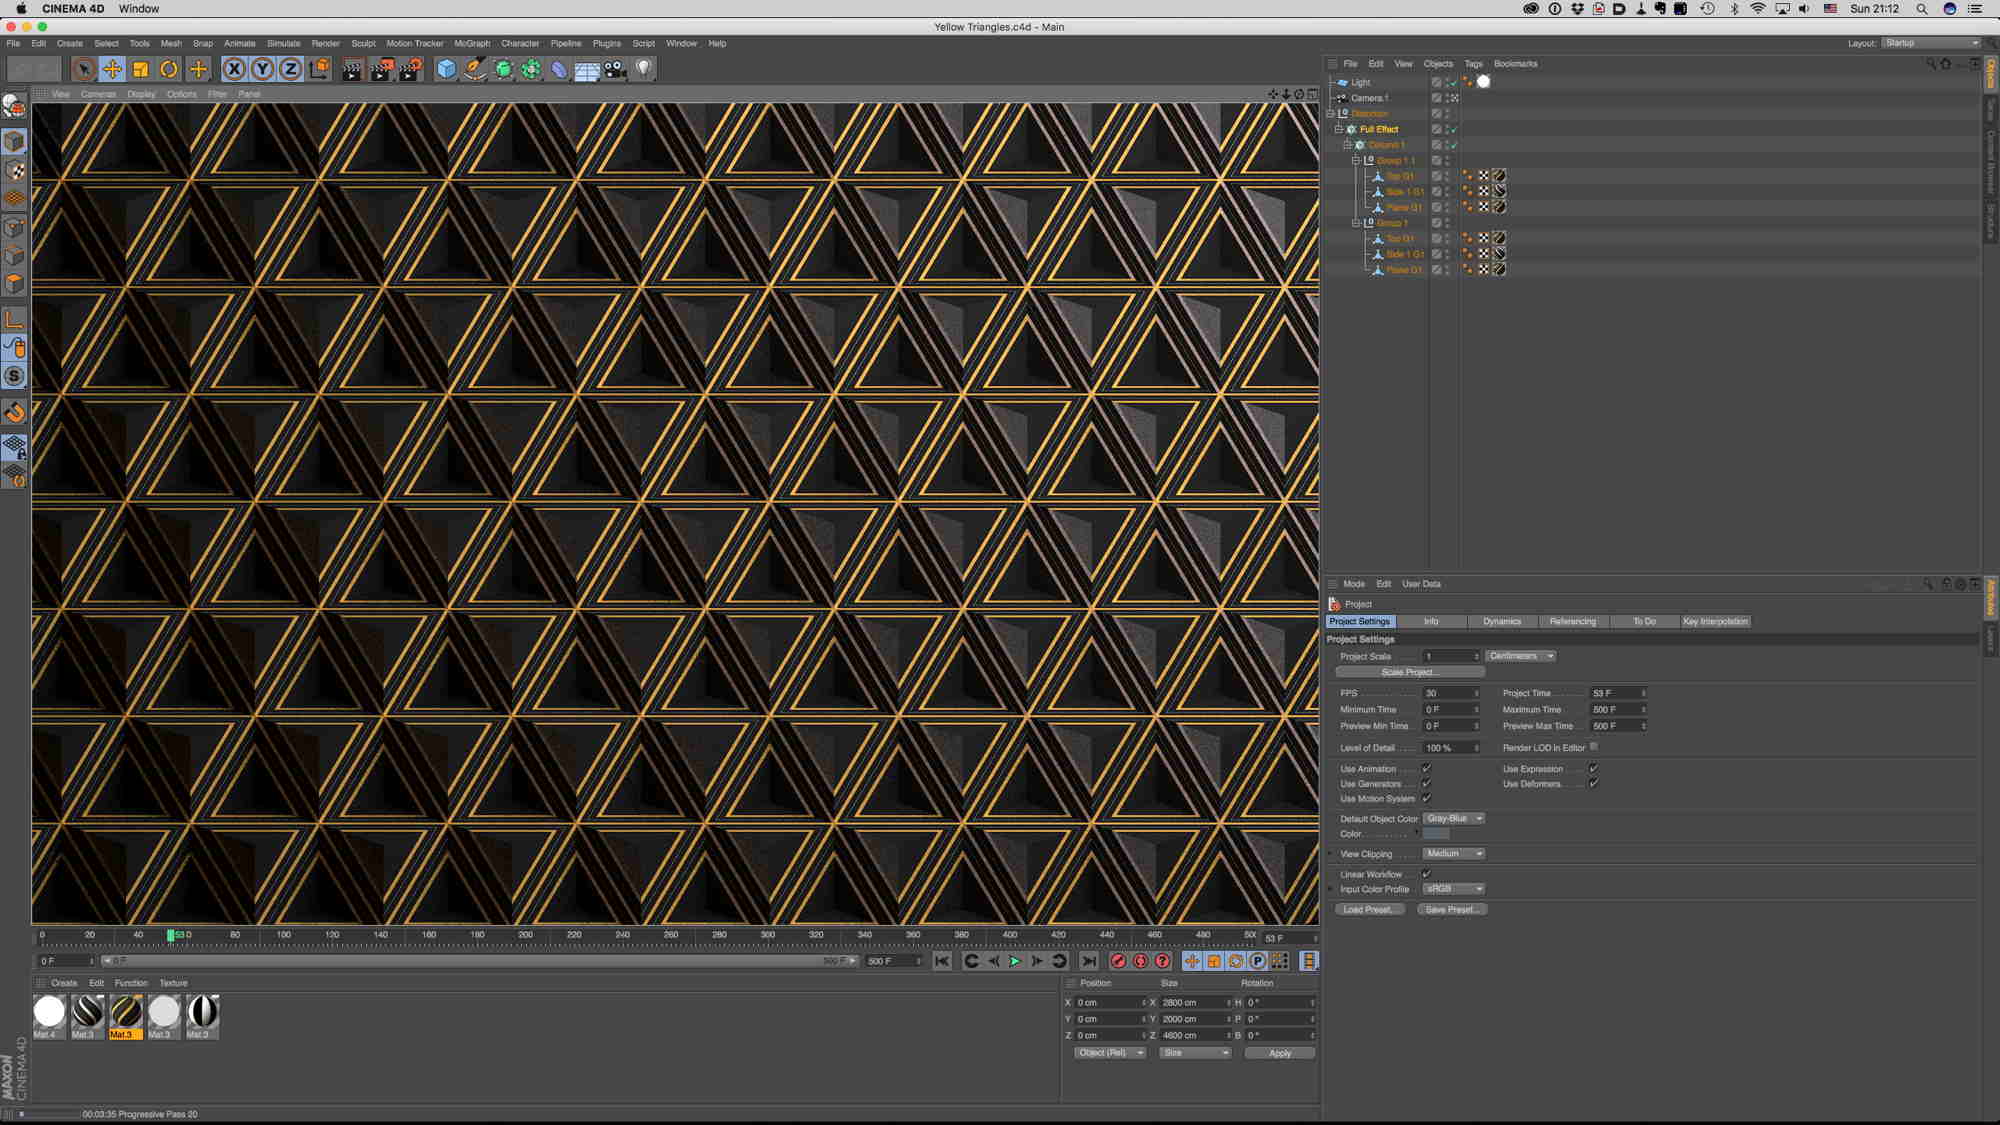
Once the designs were completed in 3D as well, I rendered out some stills and then set them in sequence in Illustrator to see which pattern would transform into another. After figuring that out I went straight into Cinema 4D and started playing around with different ideas on how the transformations would occur. As is the case most of the time the simplest method was the most effective. Panels are stacked on top of other panels in a gradual way in order to mess with the viewer’s perception and also allow them to witness firsthand, how the patterns are created. The transformations were created quite easily with Cinema 4D’s tools. Mograph was used to set up the patterns and transform between the different shapes.
Cinema 4D’s physical renderer was used for the final rendering of the piece. The rendering was a huge undertaking. Early on I decided to 1) use a rendering method that would be time-consuming and 2) to render everything in 4k. With renders taking in some cases more than 45 minutes per frame on my machine and with 2446 frames in total I realised I couldn’t do it with just one computer. So a render farm was needed. Thankfully I knew about Google’s Zync service that offered rendering for relatively cheap prices (I go into more details about the service in this Google Zync Review – Speed test video) and with their introductory $300 bonus for using the service I was willing to give it a try! I rendered more than 80% of the animation on Zync and it was a huge time saver. What would have taken a month or more of 24 hour renders on my machine was done in a couple of hours on Zync. So I didn’t have to wait forever for the renders to finish and also kept my sanity in the process!! Since 4k (3840×2160) is quite a big resolution the amount of data in the end for just a little over a minute of video was quite huge. The rendered stills alone were close to 84 GB. 83.84 to be exact!
Even though I love the final result I’m definitely not looking forward to repeating the 4k rendering anytime soon! It takes x4 times more to finish a render compared to 2k and also takes an insane amount of storage space! So managing a bigger sequence than this one would probably be a nightmare!
The music was a bit tricky to do. I knew the style of music I wanted to use but it took a bit of effort to find the right one. YouTube has a really helpful section if you’re a YouTube partner where you can access quite a big library of music and also sound effects. I wanted to have a piece of music that would have a sense of exploration and lightheartedness. The music follows along with the action and in a way, it’s like a character trying to figure out what happens next. And in some cases pushes the patterns into their next stage of evolution. The good thing about YouTube is that I could find the right music for the piece and also find the music with the proper rights. You can preview everything on the website and there’s also clear information on what rights each music has.


I settled on 4 different sound bytes but the piece that immediately stood out the most was the piece that was used in the final animation. When I tried all of them on the animation it was obvious that my hunch was right. The only problem was that it was way too short. I don’t remember exactly the number now but probably around 10-12 seconds short. Which for a 1:30 minute video is quite a bit of sound missing! I ended up repeating two pieces in two different places in order to get the needed time. That also worked in the piece’s favour because there’s a little bit more anticipation at the beginning and a little bit more lightheartedness (for a lack of a better word) at the midpoint. I won’t tell you where the stitching is done but probably now that you know you will be able to notice!
The sound effects were a bit tougher to figure out than the music, and it took a bit of time to find the best fit. Initially, I wanted the effects to sound like cards falling but when I was looking for the right samples I couldn’t find anything that fit. And that made me realise that probably the better sound would be paper unfolding rather than cards falling. Once I realised that the process was quite fast. The sounds are samples stacked together to make bigger individual sounds. Some are fast unfolding and some slower unfolding. There are also just sounds of fingers dragging on paper.
As for what is coming up next? At the moment I’m focusing on creating educational videos focusing on design and 3D in general. My YouTube channel at the moment covers Adobe Illustrator and Cinema 4D, and there are plans for more of those in the next few months along with other videos around design and the creative field in general. I’m trying to keep it interesting for me as much as possible, so I’m switching between educational content and videos that are challenging me creatively and keep me on my toes. There’s one short video, that’s slowly cooking but the lack of time is a big factor here. And the complexity involved is also quite intimidating! It’s again a 3D related piece but I won’t share anything else yet! Hopefully, I will be able to sooner rather than later!! Fingers crossed! Let’s just hope my procrastination won’t kick in anytime soon!
You can subscribe to Dimitris’ YouTube channel and follow him on Twitter @marvelousdecay.
